Lab 3 : Remote Access Mikrotik Routerboard
Assalamu’alaikum
wr wb

Tujuan :
Purpose :
- Dapat mengetahui pengertian Mikrotik Routerboard
Can know what is the meaning of Mikrotik Routerboard
- Dapat mengetahui cara remote Mikrotik Routerboard melalui Winbox
Can know how to remote Mikrotik Routerboard via Winbox
- Dapat mengetahui cara remote Mikrotik Routerboard melalui telnet client
Can know how to remote Mikrotik Routerboard via telnet client
- Dapat mengetahui cara remote Mikrotik Routerboard melalui Putty
Can know how to remote Mikrotik Routerboard via putty
- Dapat mengetahui cara remote Mikrotik Routerboard melalui Hyperterminal
Can know how to remote Mikrotik Routerboard via hyperterminal
Bahan :
Materials :
- Mikrotik Routerboard
Mikrotik Routerboard
- Kabel UTP
Cable UTP
- Aplikasi Winbox
Application Winbox
- Aplikasi Putty
Applicatin Putty
- Aplikasi Hyperterminal
Application Hyperterminal
Konsep Dasar :
Basic Concepts :
- Pengertian Mikrotik Routerboard
Understanding Mikrotik Routerboard
Mikrotik routerboard adalah suatu hardware yang dapat menjalankan router network tanpa perlu di install ke sebuah PC, karena Mikrotik ini telah di desain untuk menjalankan routerOS sehingga dapat menjadi router yang handal untuk penggunanya.
Mikrotik routerboard is a hardware that can run a network router without the need to install to a PC, because this Mikrotik has been designed to run RouterOS so that router it can be reliable for users.
- Pengertian Winbox
Understanding Winbox
Winbox adalah utility yang digunakan untuk konektivitas dan konfigurasi MikroTik menggunakan MAC Address atau protokol IP. Dengan winbox kita dapat melakukan konfigurasi MikroTik menggunakan modus GUI dengan cepat dan sederhana.
Winbox is a utility that is used for connectivity and configuration MikroTik by MAC address or IP protocol. With winbox we can do MikroTik configuration using GUI mode with fast and simple.
- Pengertian Putty
Understanding Putty
Putty adalah sebuah program open source yang dapat Anda gunakan untuk melakukan protokol jaringan SSH, Telnet dan Rlogin. Protokol ini dapat digunakan untuk menjalankan sesi remote pada sebuah komputer melalui sebuah jaringan LAN maupun internet.
Putty is an open source program that you can use to perform network protocol SSH, Telnet and Rlogin. This protocol can be used to perform remote sessions on a single computer via a LAN network or the Internet.
- Pengertian Hyperterminal
Understanding Hyperterminal
HyperTerminal adalah sebuah program yang dirancang untuk melaksanakan fungsi komunikasi dan emulasi terminal. HyperTerminal memungkinkan pengguna komputer memanfaatkan komputer lainnya untuk berhubungan antara dua system.
HyperTerminal is a program designed to perform the functions of communication and terminal emulation. HyperTerminal allows computer users utilize other computers to connect between the two systems.
Langkah-langkah :
Steps :
- Pastikan kabel UTP sudah terpasang di laptop atau pc yang terhubung ke Mikrotik routerboard
Make sure UTP cables is plugged on the laptop or PC that is connected to Mikrotik routerboard
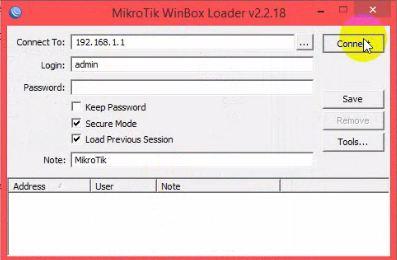
- Buka aplikasi Winbox yang sudah terinstall di laptop anda, sambungkan ke Mikrotik menggunakan MAC Address
Open Winbox application already installed on your laptop, connect to the Mikrotik using MAC Address

- Masuk ke menu IP lalu pilih Addresses, untuk menambahkan IP
Go to the menu IP and select Addresses, to add IP

- Tekan tanda “+” untuk memasukkan IP yang akan ditambahkan, kemudian klik apply lalu ok
Press the “+” to enter IP to be added, then click apply and ok

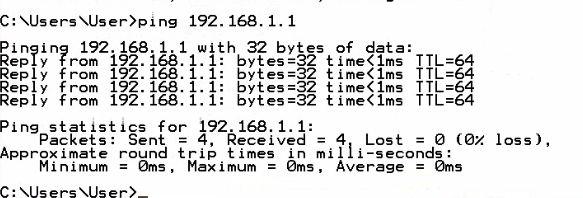
- Buka CMD dan ping ip tersebut
Open CMD and ping the IP
- Buka apliasi Winbox, sambungkan ke Mikrotik menggunakan IP yang sudah dibuat tadi
Open apliasi Winbox, connect to Mikrotik using IP that has been made earlier
- Selajutnya pilih menu new terminal, dan ketikkan perintah “IP” untuk melihat jenis network yang digunakan
Following select menu new terminal and type the command "IP" to see the type of network being used
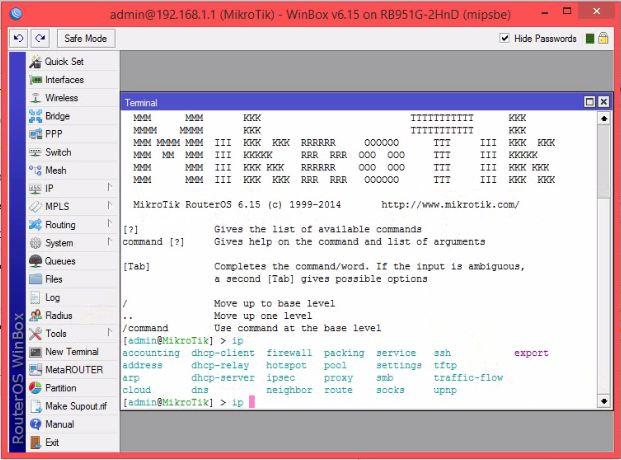
- Ketikkan perintah “ip address print” untuk melihat semua IP yang digunakan
Type the command "ip address print" to see all IP used
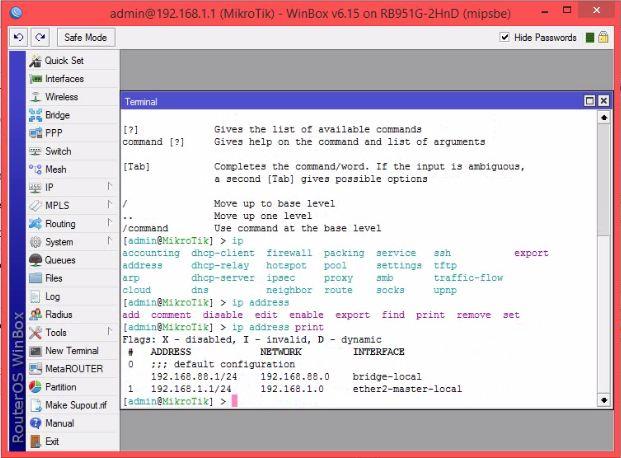
- Lalu coba edit IP tersebut dengan menggunakan perintah “ip address edit”
Then try to edit the IP using the command "ip address edit"
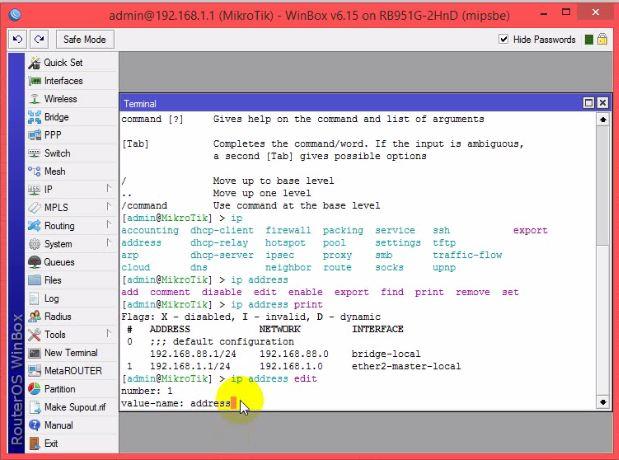
- Dan diubah IP nya
And changed his IP
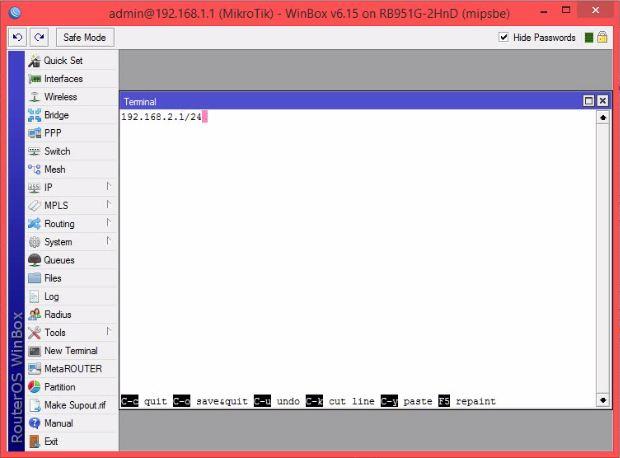
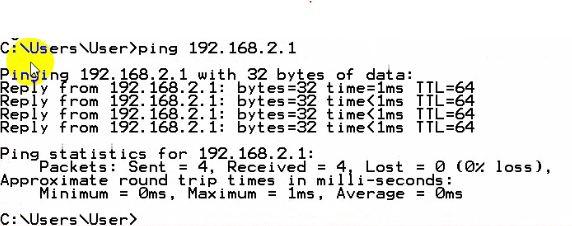
- Buka CMD dan ping IP yang sudah diganti
Open the CMD and ping the IP that has been replaced
- Lalu coba di laptop atau pc anda yang berperan sebagai client, dengan cara mengatur ip di laptop atau pc sesuai dengan IP yang sudah dibuat tadi
Then try it on your laptop or PC that acts as a client, by regulating the laptop or pc ip in accordance with the IP that has been made earlier

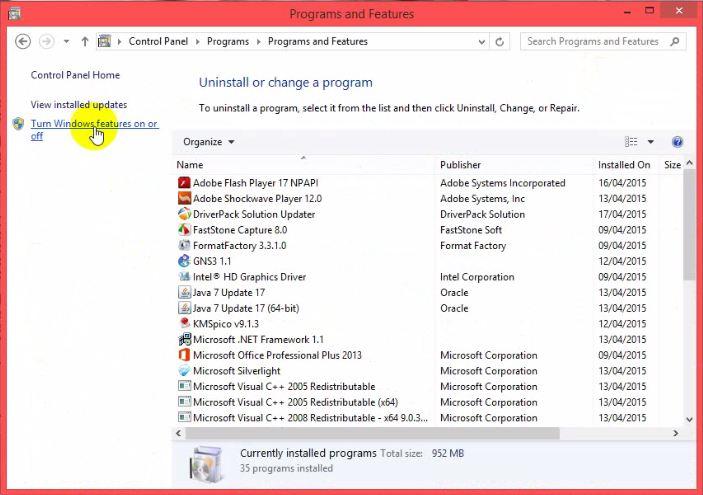
- Buka contol panel, pilih “uninstall a program”
Open the contol panel, select "uninstall a program"
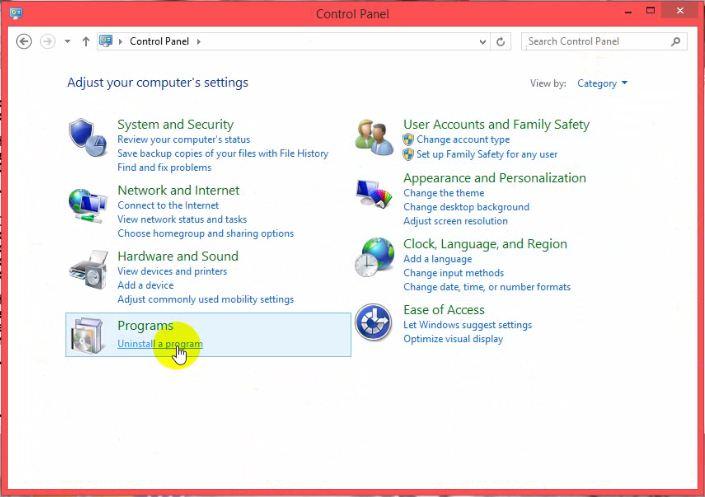
- Pilih “turn windows features on or off” untuk mengaktifkan telnet client
Select the "Turn Windows features on or off" to activate the telnet client
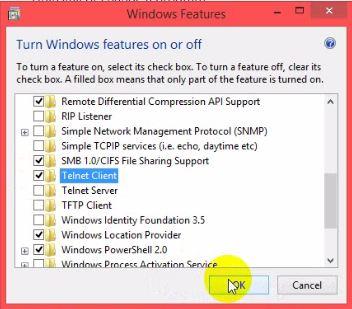
- Beri tanda centang dibagian telnet client
Tick telnet client section
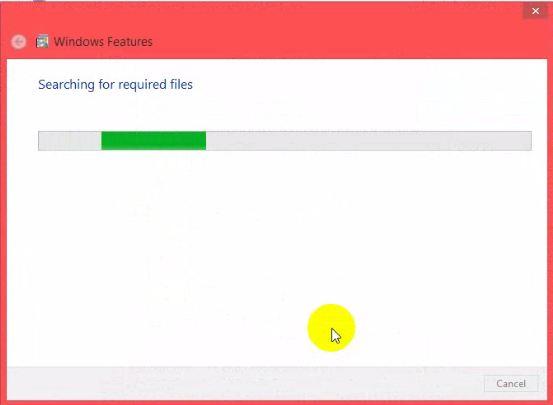
- Tunggu sebentar sampai prosesnya selesai
Wait until the process is finished

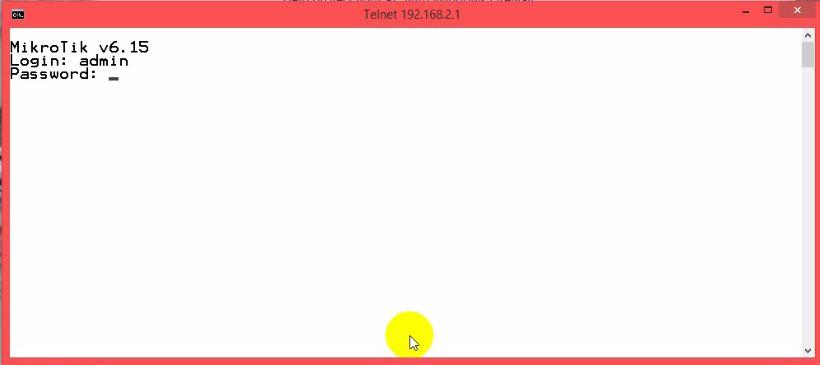
- Buka CMD dan ketikkan perintah “telnet (ip address)”, kemudian tekan enter
Open the CMD and type the command "telnet (ip address)", then press enter

- Kalau bisa login, itu berarti remot mikrotik melalui CMD berhasil
If you can login, it means remote mikrotik via CMD successfully
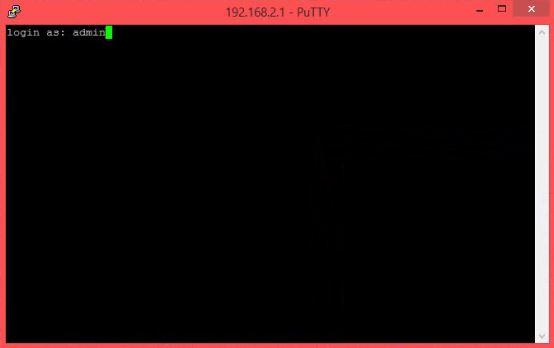
- Sekarang coba menggunakan aplikasi Putty, buka aplikasi Putty. Lalu masukkan ip address dan klik open dan klik open
Now try using Putty application, open the Putty application. Then enter the IP address and click open

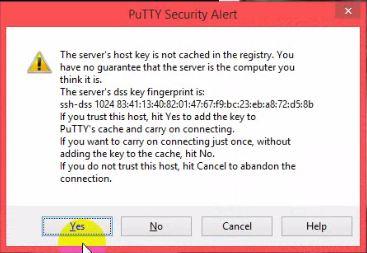
- Jika muncul tampilan seperti ini, pilih “yes”
If appear like this, select "yes"
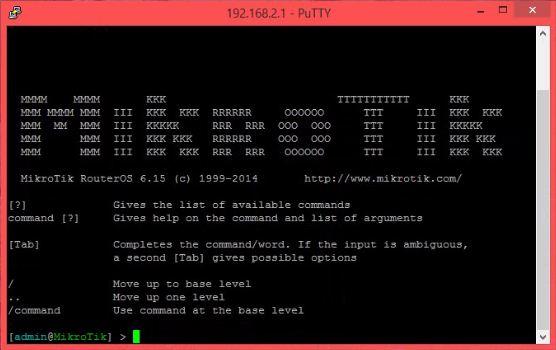
- Maka hasilnya langsung bisa login, itu berarti remote Mikrotik melalui Putty berhasil
Then the result can directly log, it means remote Mikrotik via Putty successfully
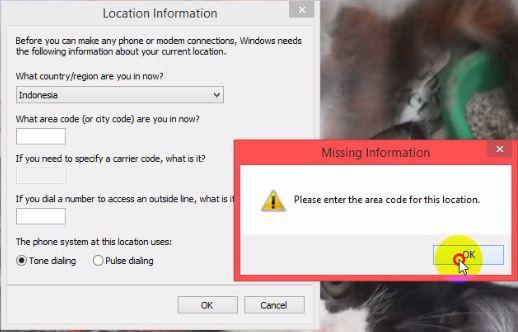
- Buka aplikasi hyperterminal, dan atur lokasi tempat anda tinggal
Open the hyperterminal application, and set the location where you live

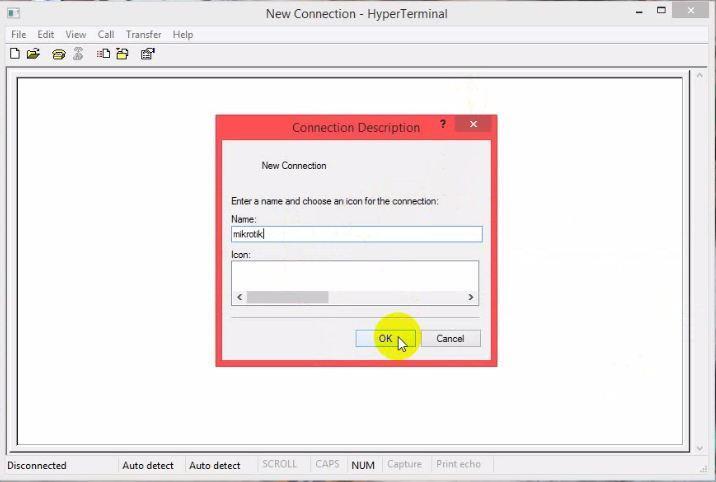
- Masukkan nama sesuai dengan keinginan anda, klik ok
Enter the name of accordance with your wishes, click ok
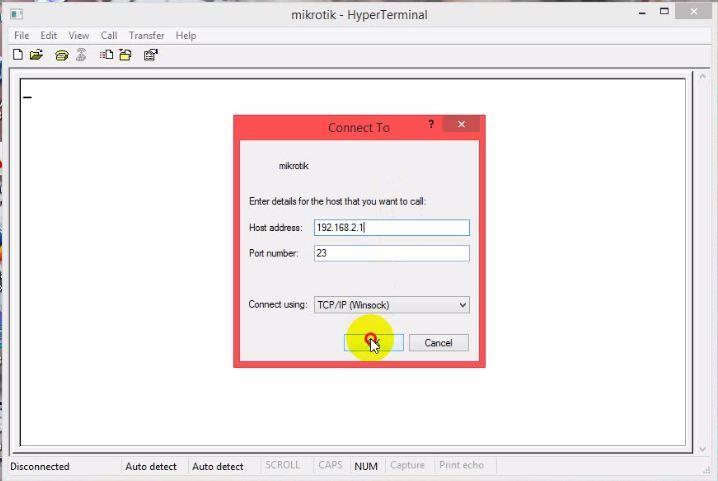
- Selanjutnya isi host address (ip Mikrotik) dan nomer port "23"
Then fill in host address (IP Mikrotik) and the port number "23"
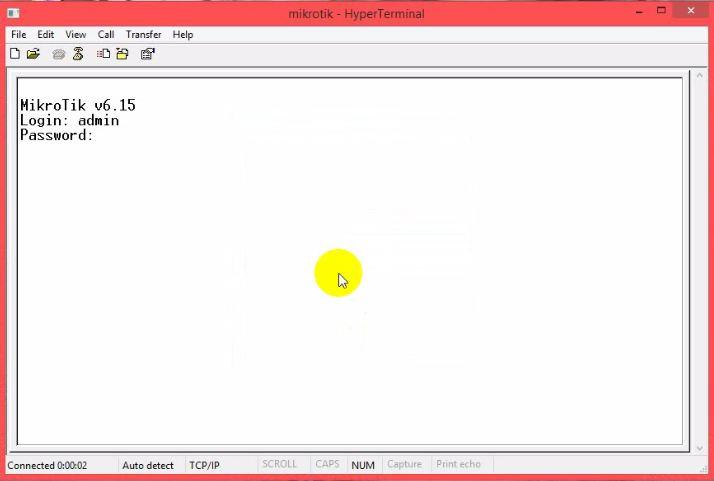
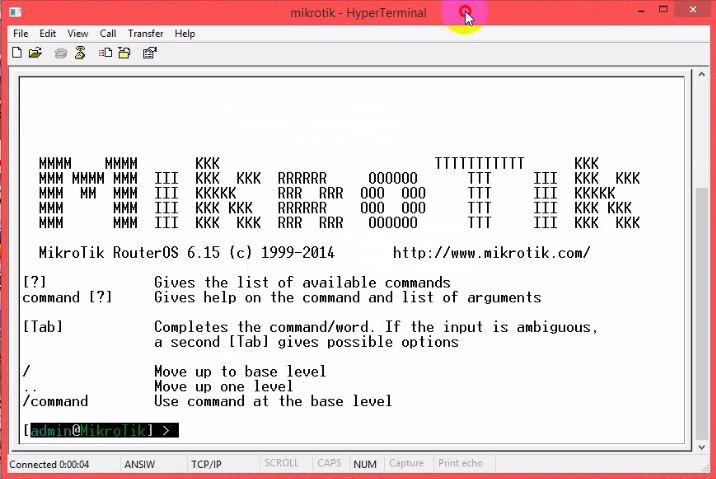
- Lalu login, kalau bisa login berarti konfigurasi mikrotik melalui hyperterminal sudah berhasil
Then log in, if you can log mean proxy configuration through hyperterminal already successfully
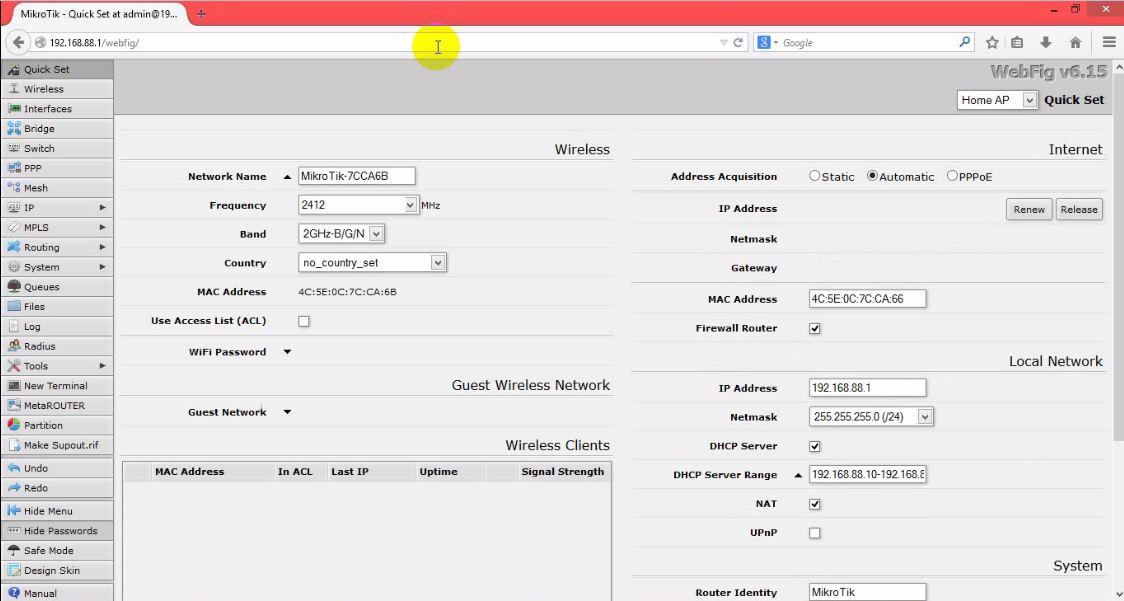
- Buka web browser dan masukkan IP, jika bisa masuk (login) maka konfigurasi dasar Mikrotik sudah berhasil
Open a web browser and enter the IP, if you can get in (login), the basic configuration has been successfully Mikrotik
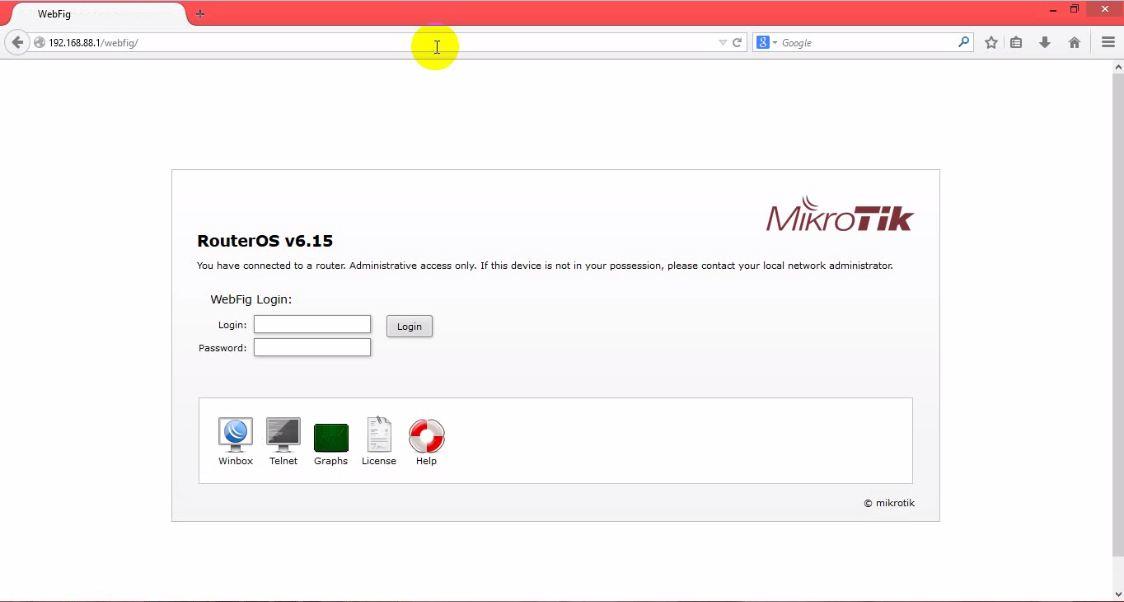
- Dan ini tampilan kalau remote Mikrotik melalui weppig
And this is the view that remote Mikrotik through weppig
Cukup sekian dan terima kasih
That's all and thank you
Mohon maaf bila ada penulisan
bahasa yang salah
Sorry if there
was writing the
incorrect language
Wassalamualaikum
wr wb