Lab 8 : Configuration interface in Mikrotik Routerboard
Tujuan :
Purpose :
- Dapat mengetahui pengertian Mikrotik Routerboard
Can know what is the meaning of Mikrotik Routerboard
- Dapat mengetahui cara konfigurasi interfaces di Mikrotik Routerboard
Can know how to interfaces configuration in Mikrotik Routerboard
Bahan :
Materials :
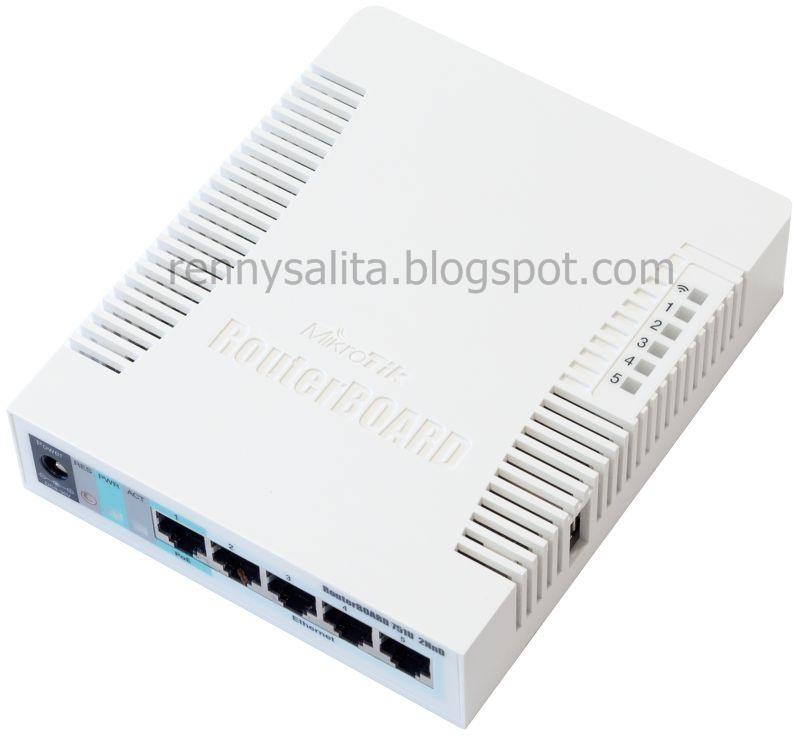
- Mikrotik Routerboard + charger
Mikrotik Routerboard + charger
- Kabel UTP
Cable UTP
- Switch
Switch
- Aplikasi WinBox
Application WinBox
Konsep Dasar :
Basic Concepts :
- Pengertian Mikrotik Routerboard
Understanding Mikrotik Routerboard
Mikrotik routerboard adalah suatu hardware yang dapat menjalankan router network tanpa perlu di install ke sebuah PC, karena Mikrotik ini telah di desain untuk menjalankan routerOS sehingga dapat menjadi router yang handal untuk penggunanya.
Mikrotik routerboard is a hardware that can run a network router without the need to install to a PC, because this Mikrotik has been designed to run RouterOS so that router it can be reliable for users.
- Pengertian WinBox
Understanding WinBox
Winbox adalah utility yang digunakan untuk konektivitas dan konfigurasi MikroTik menggunakan MAC Address atau protokol IP. Dengan winbox kita dapat melakukan konfigurasi MikroTik menggunakan modus GUI dengan cepat dan sederhana.
Winbox is a utility that is used for connectivity and configuration MikroTik by MAC address or IP protocol. With winbox we can do MikroTik configuration using GUI mode with fast and simple.
Langkah-langkah :
Steps :
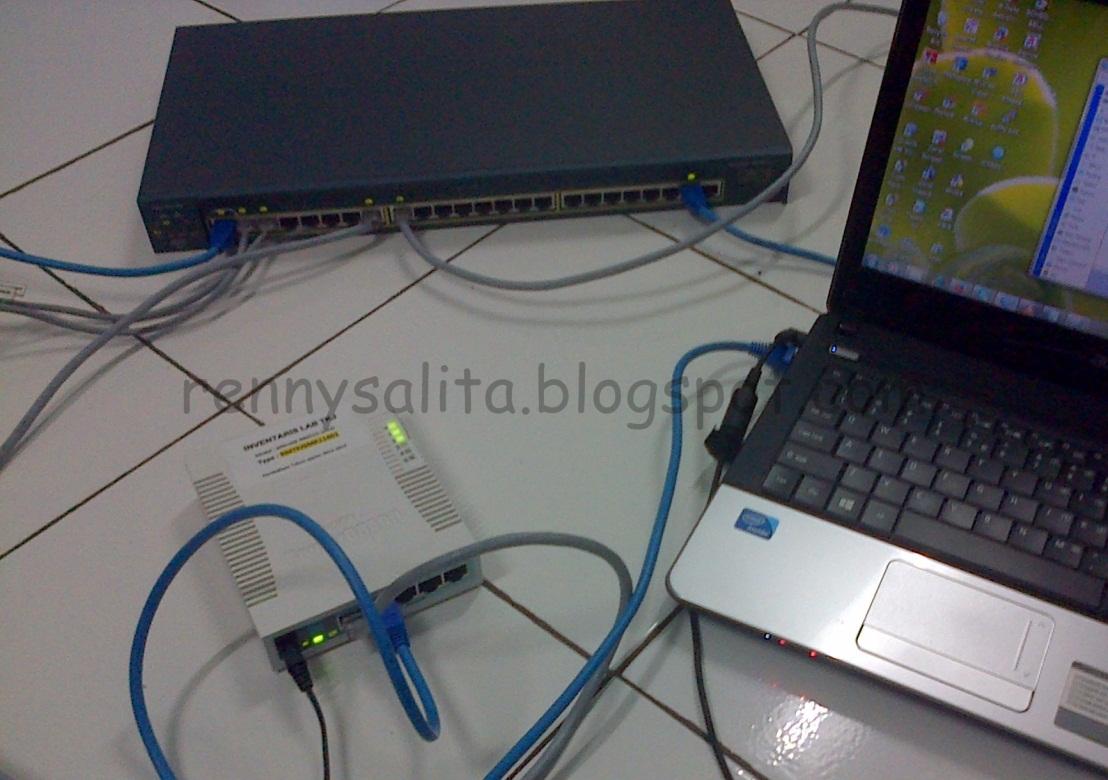
- Pastikan kabel UTP sudah terpasang di laptop yang terhubung ke port 2 Mikrotik routerboard. Tancapkan kabel UTP dari switch ke port 1 routerboard.
Make sure UTP cables is plugged on the laptop that is connected to port 2 Mikrotik routerboard. Plug the UTP cable from switch to port 1 routerboard.
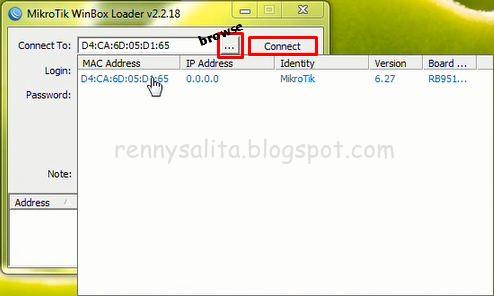
- Buka aplikasi WinBox, pilih “browse” untuk melihat IP atau Mac Address routerboard dan klik Mac Address itu. Klik “sambungkan” untuk menyambungkan aplikasi ke routerboard.
Open application WinBox, select “browse” to view the IP or Mac Address routerboard and click Mac Address. Click “connect” to connecting applications to routerboard.
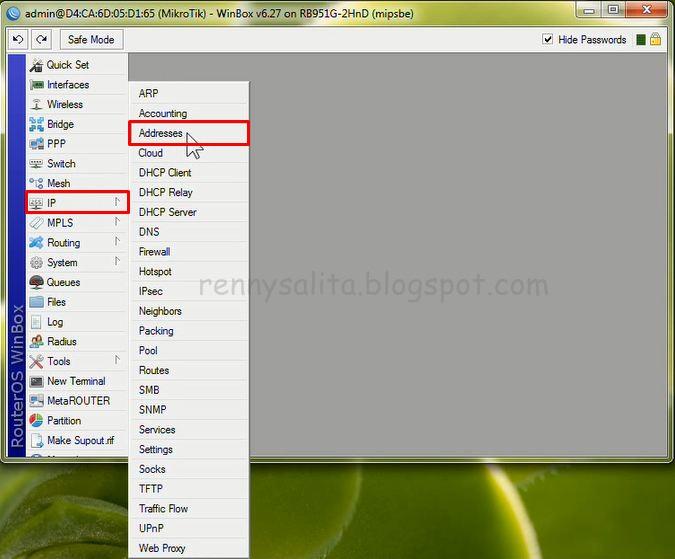
- Pilih menu “IP” lalu pilih “Address”
Select ”IP” menu then select “Address”
- Tambahkan IP address ether1 lalu klik apply, maka otomatis IP network akan terisi lalu klik ok
Add the IP address ether1 then click apply, then the IP network will be filled automatically and then click ok

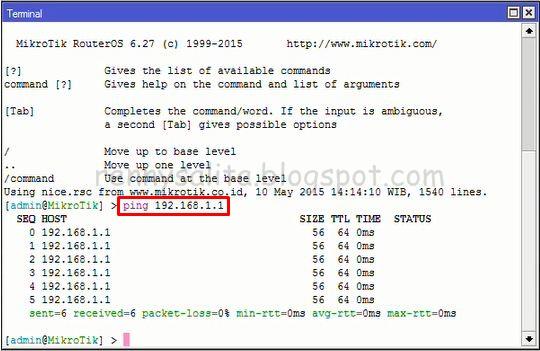
- Lakukan ping ke IP server, kalau seperti ini berhasil
Do a ping to the IP server, this means that such successful
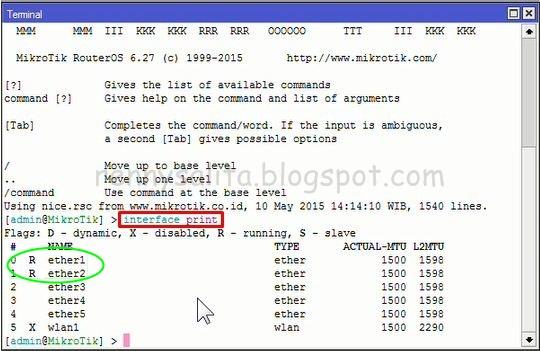
- Cek interface yang ada di routerboard, dengan cara >interface print
Check interface in routerboard, with commands >interface print
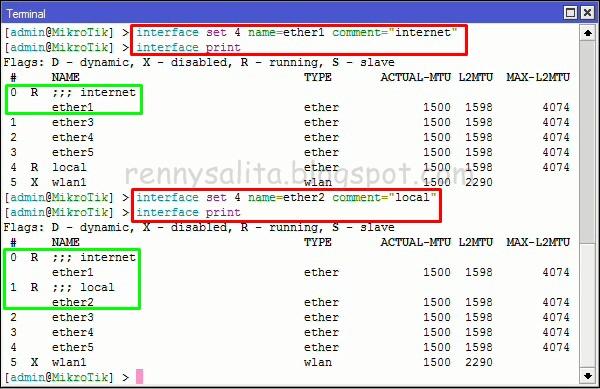
- Kemudian ganti nama interface “ether1” menjadi “public” dan “ether2” menjadi “local”. Lalu cek dengan cara >interface print
Then rename interface "ether1" become "public" and "ether2" become "local". Then check the way >interface print
- Setelah itu ubah komen interface ether1 (publik) menjadi komen “internet”. Dan ubah komen interface ether2 (local) menjadi komen “local”. Lalu cek dengan cara >interface print
After that change comments ether1 interface (public) into the comment "internet". And change the interface comments ether2 (local) into the comment "local". Then check the way >interface print
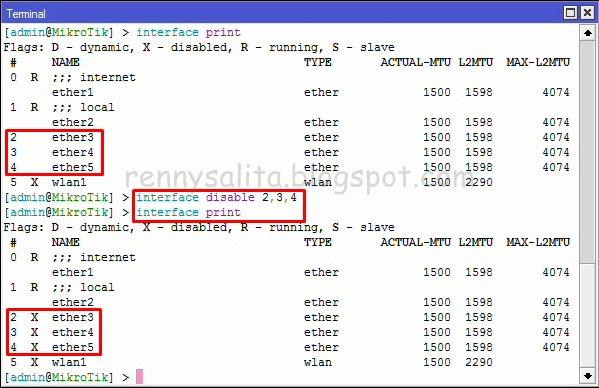
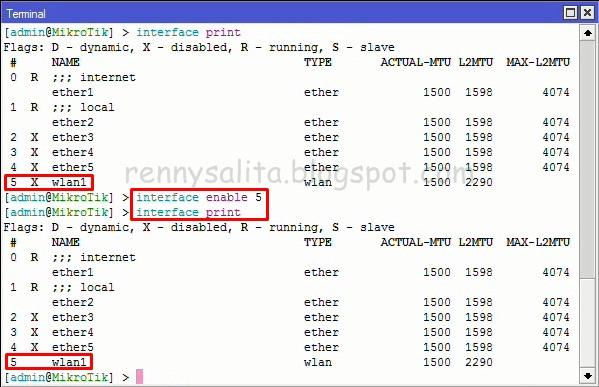
- Cara disable interface >interface disable (urutan ether yang ingin di disable). Lalu cek dengan cara >interface print. Maka otomatis ether 3, 4 dan 5 akan ada tanda “X”
How to disable interfaces >interface disable (ether sequence that you want to disable). Then check the way >print interface. Then automatically ether 3, 4 and 5 there will be an "X"
- Lalu lakukan “enable” wlan1 dengan cara >interface enable (urutan ether yang ingin di disable). Lalu cek dengan cara >interface print. Maka otomatis tanda “X” pada wlan1 akan hilang
Then do the "enable" wlan1 a way >enable interface (ether sequence that you want to disable). Then check the way >print interface. Then automatically the sign "X" on wlan1 will be lost
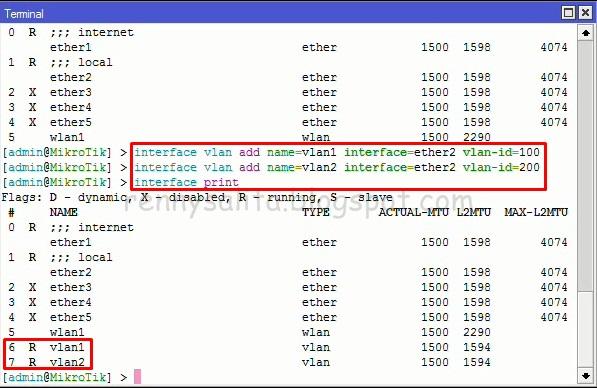
- Lalu kita akan membuat VLAN, ketikkan perintah seperti dibawah ini lalu sesuaikan interface apa yang ingin dibuat VLAN. Lalu cek dengan cara >interface print
Then we will create a VLAN, enter the command as shown below and adjust the interface what you want to create VLAN. Then check the way >interface print
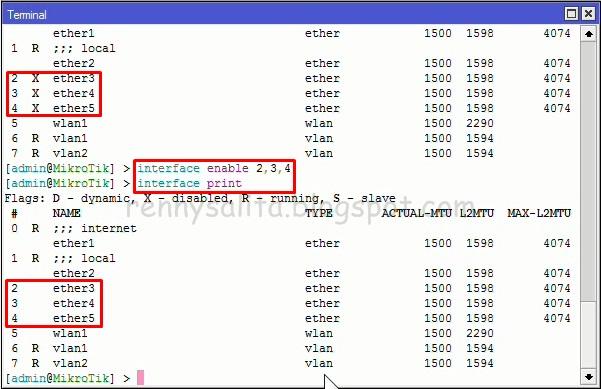
- Lakukan “enable” ether3, ether4, dan ether5 dengan cara >interface disable (urutan ether yang ingin di enable). Lalu cek dengan cara >interface print
Do "enable" ether3, ether4, and ether5 by way >disable interface (ether sequence that you want to enable). Then check the way >interface print
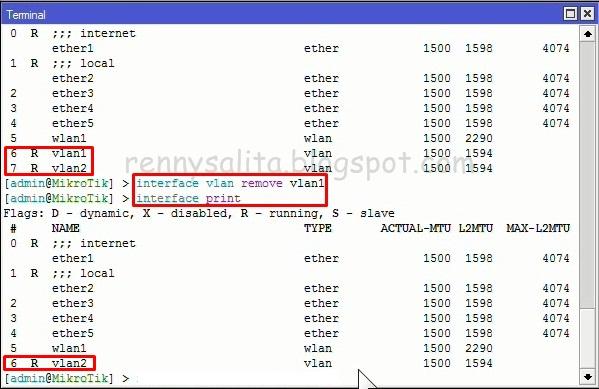
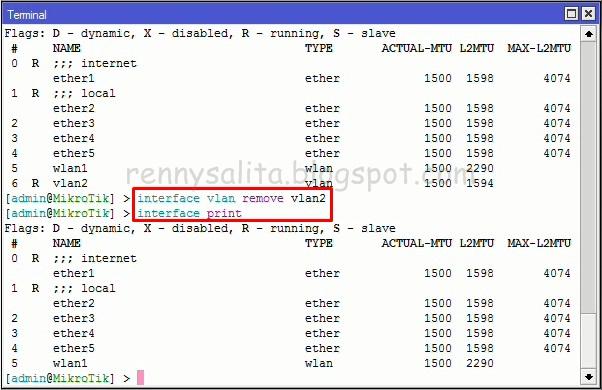
- Kemudian “remove” kedua VLAN yang sudah dibuat, dengan cara >interface vlan remove (nama VLAN). Lalu cek dengan cara >interface print
Then the "remove" the VLAN that has been created, by way >remove VLAN interface (VLAN name). Then check the way >interface print
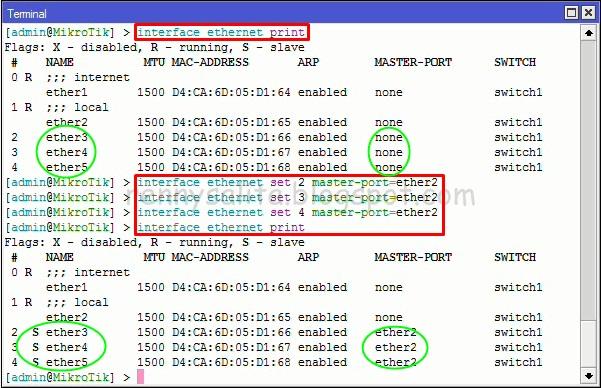
- Cara membuat router menjadi switch, saya akan merubah ether3, ether4, dan ether5 menjadi switch dengan cara seperti ini. Lalu cek dengan cara >interface ethernet print maka otomatis sudah berubah menjadi “S” (Switch)
How to make the router into the switch, I will change ether3, ether4, and ether5 be a switch in this way. Then check the way >print ethernet interface then automatically be changed to "S" (Switch)
Cukup sekian dan terima kasih
That's all and thank you
Mohon maaf bila ada penulisan bahasa yang salah
Sorry if there was writing the incorrect language